
BUILDING BIG. When Paul Hamann and his son, Corey, started adding custom strip-till work on neighboring farms, they decided to build a bigger 12-row rig. They started with a Hiniker toolbar, which they shortened by 30 inches. Then, they mounted 12 Yetter 2984 Maverick HR Plus row units on it and purchased an Elk Creek fertilizer caddy with a 30-ton lift. They also attached a used 6-ton Montag dry fertilizer cart with a Raven 6000 system and a scale. With about $49,000 invested, they were able to get 4 years of use out of the rig before selling it to farmer in Iowa for $30,000.
About to begin building their third strip-till rig, Paul Hamann and his son, Corey, have learned the nuts and bolts of taking a bare toolbar and turning it into a complete, fully-functional field implement. The duo from Fountain, Minn., are row crop and livestock farmers working on about 350 acres, 150 of which are strip-tilled continuous corn.
Starting in 2010, the Hamanns built their first 4-row strip-till rig with 36-inch row spacings. At the time, the smaller rig was all they needed for their farm’s acreage.
As they branched out and started adding a large volume of custom strip-till work on neighboring farms though, they built a 12-row strip-till bar during the 2011 growing season. They used this one successfully for about 4 years before Corey moved to Illinois for work. Hamann planned on scaling back the custom work in his son’s absence, so he sold the 12-row bar to a farmer in Iowa.
Now that his son is moving back, Hamann has decided to take up the next venture. As the new naked planter frame, which will become a 6-row rig, sits on the floor awaiting configuration, Hamann shares a few considerations that he personally makes before building a strip-till rig:
Build on a Budget
The first step is crunching numbers. Jumping in blind could leave a farmer spending more on a rig than they can afford, Hamann says. He says there are three distinct types of purchases.
“You can find a cheap, used, complete strip-till rig that maybe a farmer tried and didn’t like that you can always update or change anything you don’t like on it,” he says. “Or you can buy brand new. There are some great rigs out there, but they can get really expensive. We chose to build our own because we’ve become savvy at finding cheap parts and updating them. It has helped us keep our investment costs down.”
For Hamann’s new 6-row rig, he is looking to complete it for $20,000. He has already purchased a Case IH 900 series planter bar for $2,000 and will likely spend another $2,000 refurbishing it.
He also purchased a 2-year-old Orbit-Air Gandy box for $10,000. He already has four Yetter Maverick row units from his first rig that he will add to and update. After adding a Raven rate control system and scale, he figures that he’ll be right around the $20,000 mark.
For his previous 12-row bar, he bought a used Hiniker toolbar and cut it in two places to shorten it by 30 inches, then re-sleeved and welded the heavy toolbar. He mounted 12 Yetter 2984 Maverick HR Plus row units on it and purchased an Elk Creek fertilizer caddy with a 30-ton lift.
“We saved about $10,000 by buying the used toolbar and spent another $2,000 building it, not counting the cost of the row units,” Hamann says. “We also bought a used 6-ton Montag dry fertilizer cart with a Raven 6000 system and a scale. All told, we spent about $49,000 on this strip-till rig, which is about half of what it would cost new.”
When originally planning that rig, Hamann didn’t think too much about resale value, but this ended up being an important consideration when it came time to sell it. They sold it to a farmer in Iowa for around $30,000.
Hamann felt good about the transaction because he saved on the cost of a brand new rig up front by building his own, got 4 years of use out of it and sold it for an amount that recouped a significant portion of the initial investment.
Consider Components
After successfully building two rigs, Hamann is starting to know what attachments he likes to suit their operation. A used toolbar worked well for his 12-row rig, but he finds that the Case IH 900 series works well for smaller rigs and they’re also fairly easy to find and inexpensive.
“The reason we like building with a used 900 or 950 series planter frame is because of the beefiness of the bar,” he says. “The bar is big and the lift system is heavier than others like a John Deere or a White. The tubes are smaller on those and the hydraulic lift systems are lighter.”
When it comes to fertilizer delivery, the size of the bar makes a difference, but Hamann is after simplicity of use no matter how big the rig is.
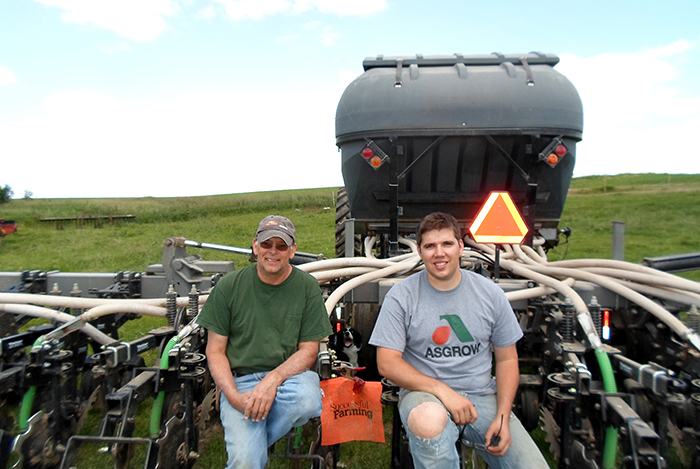
FAMILY DUO. This spring, Paul Hamann and his son, Corey, will start building their third strip-till rig together. They are designing it to be a 6-row rig. So far, they have a Case IH 900 series planter frame and an Orbit-Air Gandy system and four leftover Yetter Maverick row units from an older rig.
“On our first 4-row unit, we had an Orbit-Air Gandy system,” he said. “We’re putting another one of those on our new 6-row rig because it’s easy to install, set up and use. It’s not built for bigger scale though. For that you’re better off with a Montag system like we had on our 12-row, which is another system that’s great because of its simplicity.”
Hamann is quick to note that component choice comes down to each farmer’s practice. In terms of fertilizer application with the strip-till rig, he puts down what he calls a “hot mix.”
“I try to get 20 units per acre of sulfur into my berms, usually half through ammonium sulfate (AMS) and the other through elemental sulfur,” he says. “I also put a maintenance level of phosphorus (P) and potassium (K) with a little urea and stabilizer based on grid samples.”
Row Unit Set-Up
Building a strip-till row unit that best fits a farmer’s field conditions is only half the battle, and customizing it further can unlock additional potential. By asking himself what the most important features he needs a row unit to have for his farm specifically, Hamann can make any necessary changes and estimate what costs they may add.
“Because the Maverick row units I am ordering to complete my new rig are from Illinois, they probably don’t have notched blades in the front because there are a lot of corn and soybean rotations down there that don’t need aggressive trash removal,” he says. “We’re 100% continuous corn, so we have to manage a lot of residue. When we get them, we’ll add notched blades up front so they can cut through residue. We have to tailor row units to our conditions.”
Another consideration is the shank or coulter the row units come equipped with and how they fit into a farmer’s operation.
“The Mavericks are shank-type units and mine have a regular mole knife,” Hamann says. “It seems to work particularly well for me because I do all my strip-tilling in the spring. The mole knife acts like a mole and pushes the dirt up sort of boils it rather than slabbing it. With this setup we can hit the field when the soil is still tacky. The berm will dry out in a week and it’s a great way to get in the field early.”
Updates & Upgrades
When assessing the costs of assembling a strip-till rig, it’s unwise to assume that used parts will arrive field-ready. Hamann expects to replace and refurbish everything on each piece of the rig as it comes into the shop.
This way he’ll have the benefit of customizing it as he builds while ensuring that the rig will perform properly. Hamann plans to gut his used 900 series planter frame before attaching components.
“We’ll start by sandblasting the frame and repainting it,” he says. “I want it to look nice and don’t want it to rust. We’ll put new bearings in all the wheels, attach all new hydraulic hoses and get new tires. Planter tires can tend to be narrow, so we’ll need a tire with more flotation because of the amount of weight the rig will be picking up. Those will help reduce potential compaction issues.”
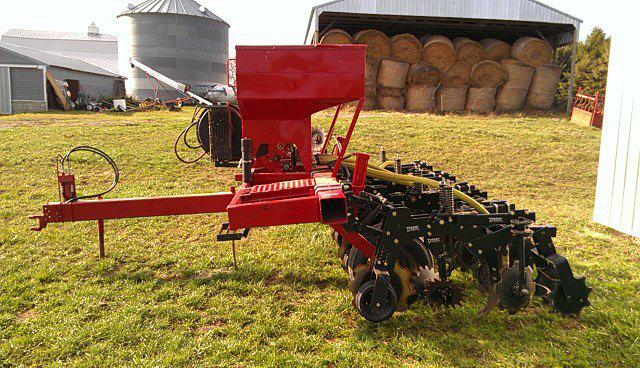
STARTING SMALL. Paul and Corey Hamann from Fountain, Minn., started small when they built their first 4-row strip-till rig. At the time, the smaller rig was all they needed for their farm’s 150 acres of corn-on-corn. They used Yetter Maverick row units and an Orbit-Air Gandy box.
Although he bought the planter frame for around $2,000, he’s planning on those updates costing another $2,000.
“The Gandy box I am buying for $10,000 is only 2 years old, but it’ll need new metering wheels and probably a few more tweaks so that’ll add another $2,000 to it as well,” says Hamann.
He also assumes that there will be additional tweaks with his Raven system and scale, but he says the most important thing he’s learned though these several extensive projects is patience.
“Sometimes we had to ask ourselves in the shop — what the hell did we just do?” he jokes. “Overall, I’d just say take your time and get as much information as you can on each part of the process.”
Click here to read our 2012 article with Paul Hamann.


Post a comment
Report Abusive Comment