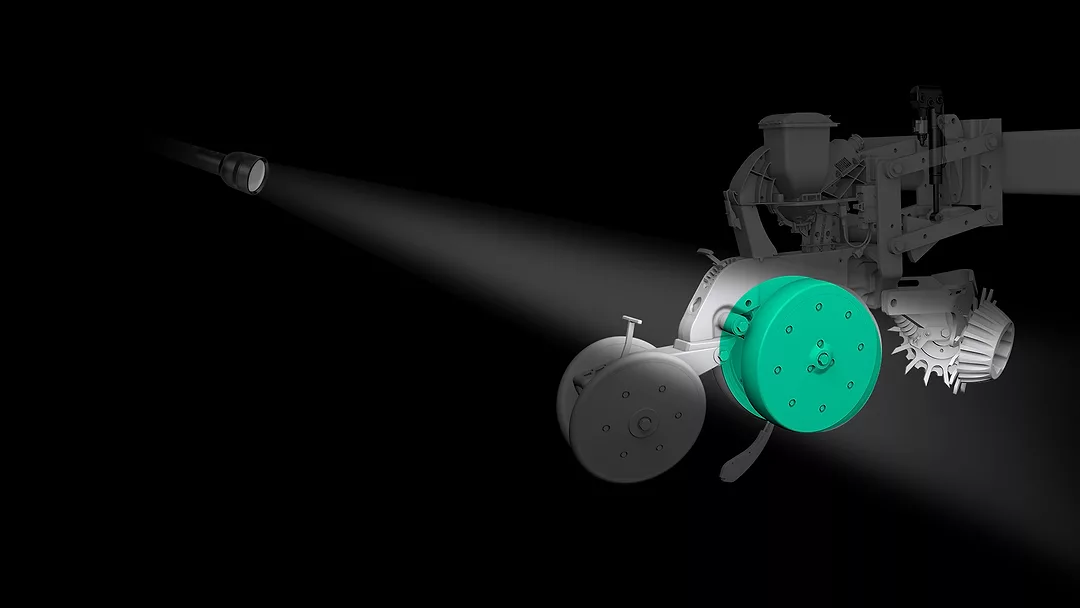
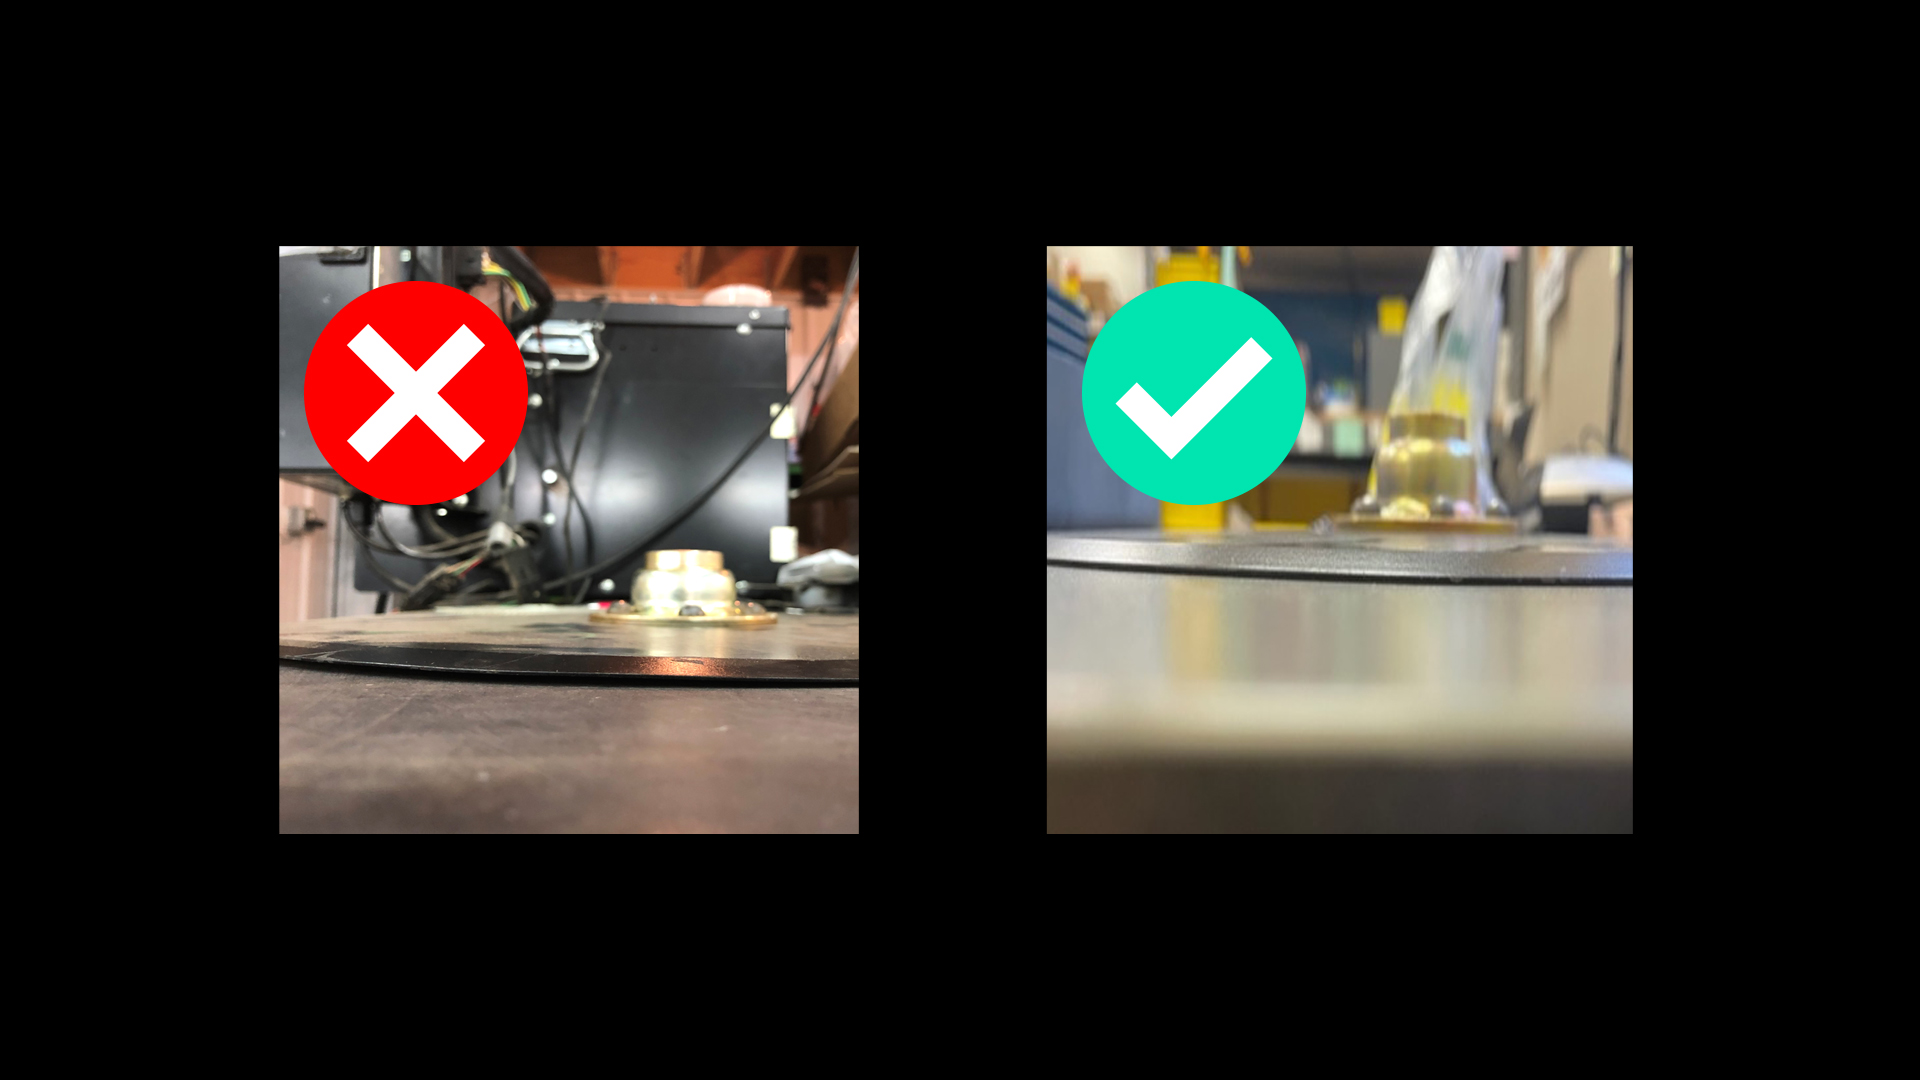
The first thing that you should be concerned with regarding your opening discs is making sure that they touch each other. On the left, you’ll see a set of opening discs that are not touching. This row-unit is at significant risk of creating a “W bottom” or a “W trench”. The trench will be formed in the shape of a W and increases the risk that you will have an air pocket around the seed. On the right, you see a set of opening discs that are touching. That's what you want.
KEEP IN TOUCH. To create a proper furrow, double disc openers should touch each other, as shown on the right. The gap between the disc on the left will increase the risk of creating an air pocket around the seed.
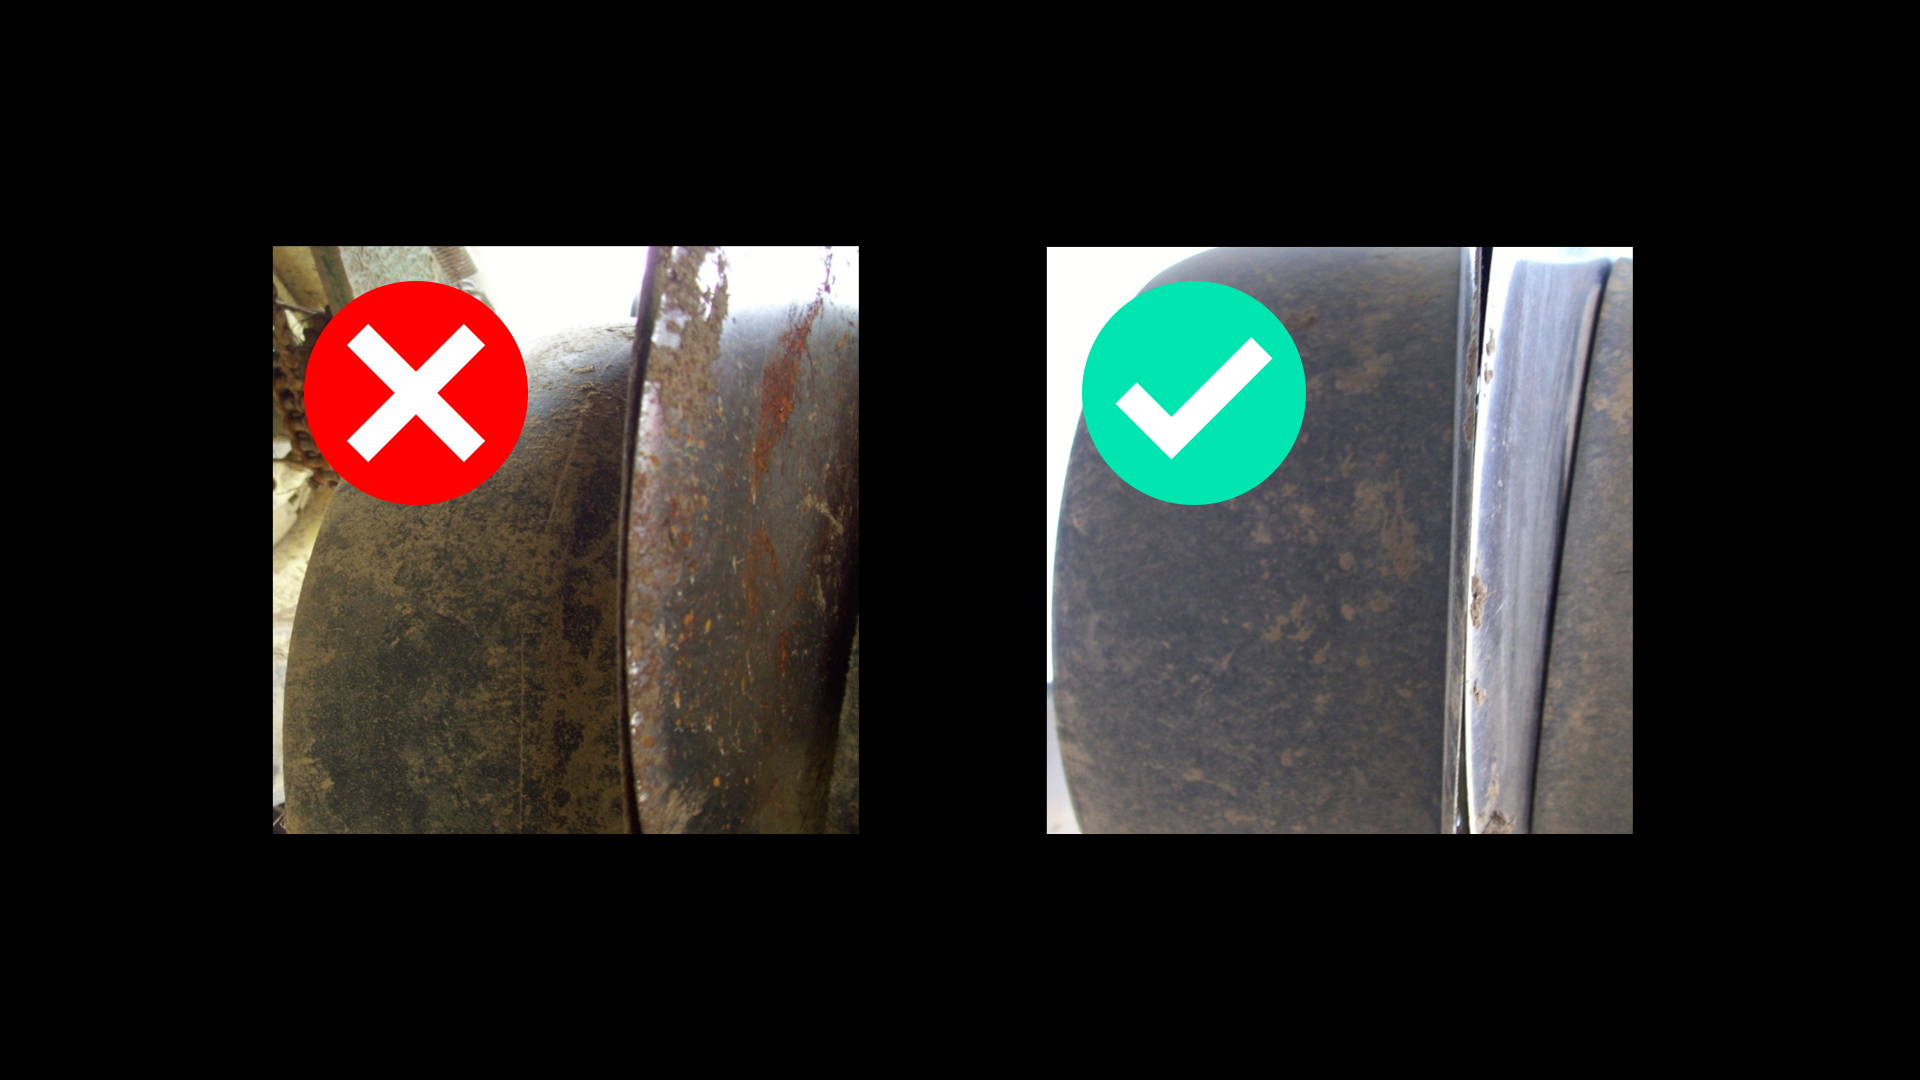
But to take this one step further, it's not just that disc openers are touching. There's a certain amount of contact that you should look for. In order to check for this slide a business card in from the front and the back of your opening discs. Once you do that, you’re going to measure the distance in between those business cards, just like you see in the photo. Now the proper distance between the business card is going to vary based on the thickness of your blade. Refer to your original equipment manufacturer or to a maintenance guide for what that contact distance should be. Secondly, on your opening disc, check the contact in three different places. You want the contact to be fairly consistent over the three places that you check. If there is significant variance in the distance of that contact point, it could be caused by a couple of different things. It could be uneven wear of the blade. It could be that the hub is off-center. Or it could be that your blade is warped.
When we talk about shimming disc openers, it's important to realize that Case IH works slightly differently. There's a leading-edge disc. There can be contact between these two discs with up to an 8-inch gap between the two discs, followed by a firming point and then a shoe on the backside that holds the sidewall open to give the seed enough time to transition to the bottom of the trench. To check that the firming point is still good, go to your local Case IH dealer and ask for their shim gauge. Place this underneath the firming point and ensure that you can still see the point in the window. This lets you know that you still have enough material left to create a clean bottom. Then inspect the thickness of the material of the shoe itself to assure that the sidewall doesn't cave in prematurely.

CASE IH FIRMING POINTS. Case IH disc openers are offset and feature a firming point and a shoe to hold the sidewall open. Be sure to get the Case IH shim gauge to make sure your firming points and shoes are still good.
One thing that causes the contact point to vary significantly as you check in multiple spots could be a warped blade. Obviously, this can happen on a used disc, but you could have it on a brand new disc as well. This is a pretty easy check. Just lay your disc opener on a flat surface and look to see if there’s any warping of the disc blade. The reason we care about this is it's going to affect the consistency of your depth.
WARPED WON'T WORK. A warped disc, as seen on the left, can make the depth of your furrow inconsistent.
The other things that we mentioned are that we could have some uneven wear or the hub could be off-center. Here’s what we can do to check for this. Put a bolt in a vice and make sure that it's plumb. Next, slide your opening disc over that bolt and slowly spin it. You can use a ratchet wrench extension as a reference. Does the edge of that disc ever change in the distance from the edge to that extension? If that distance stays really consistent your disc is in good shape. If you’re seeing changes in that distance as you spin the disc you either have uneven wear or your hub may be off-center.
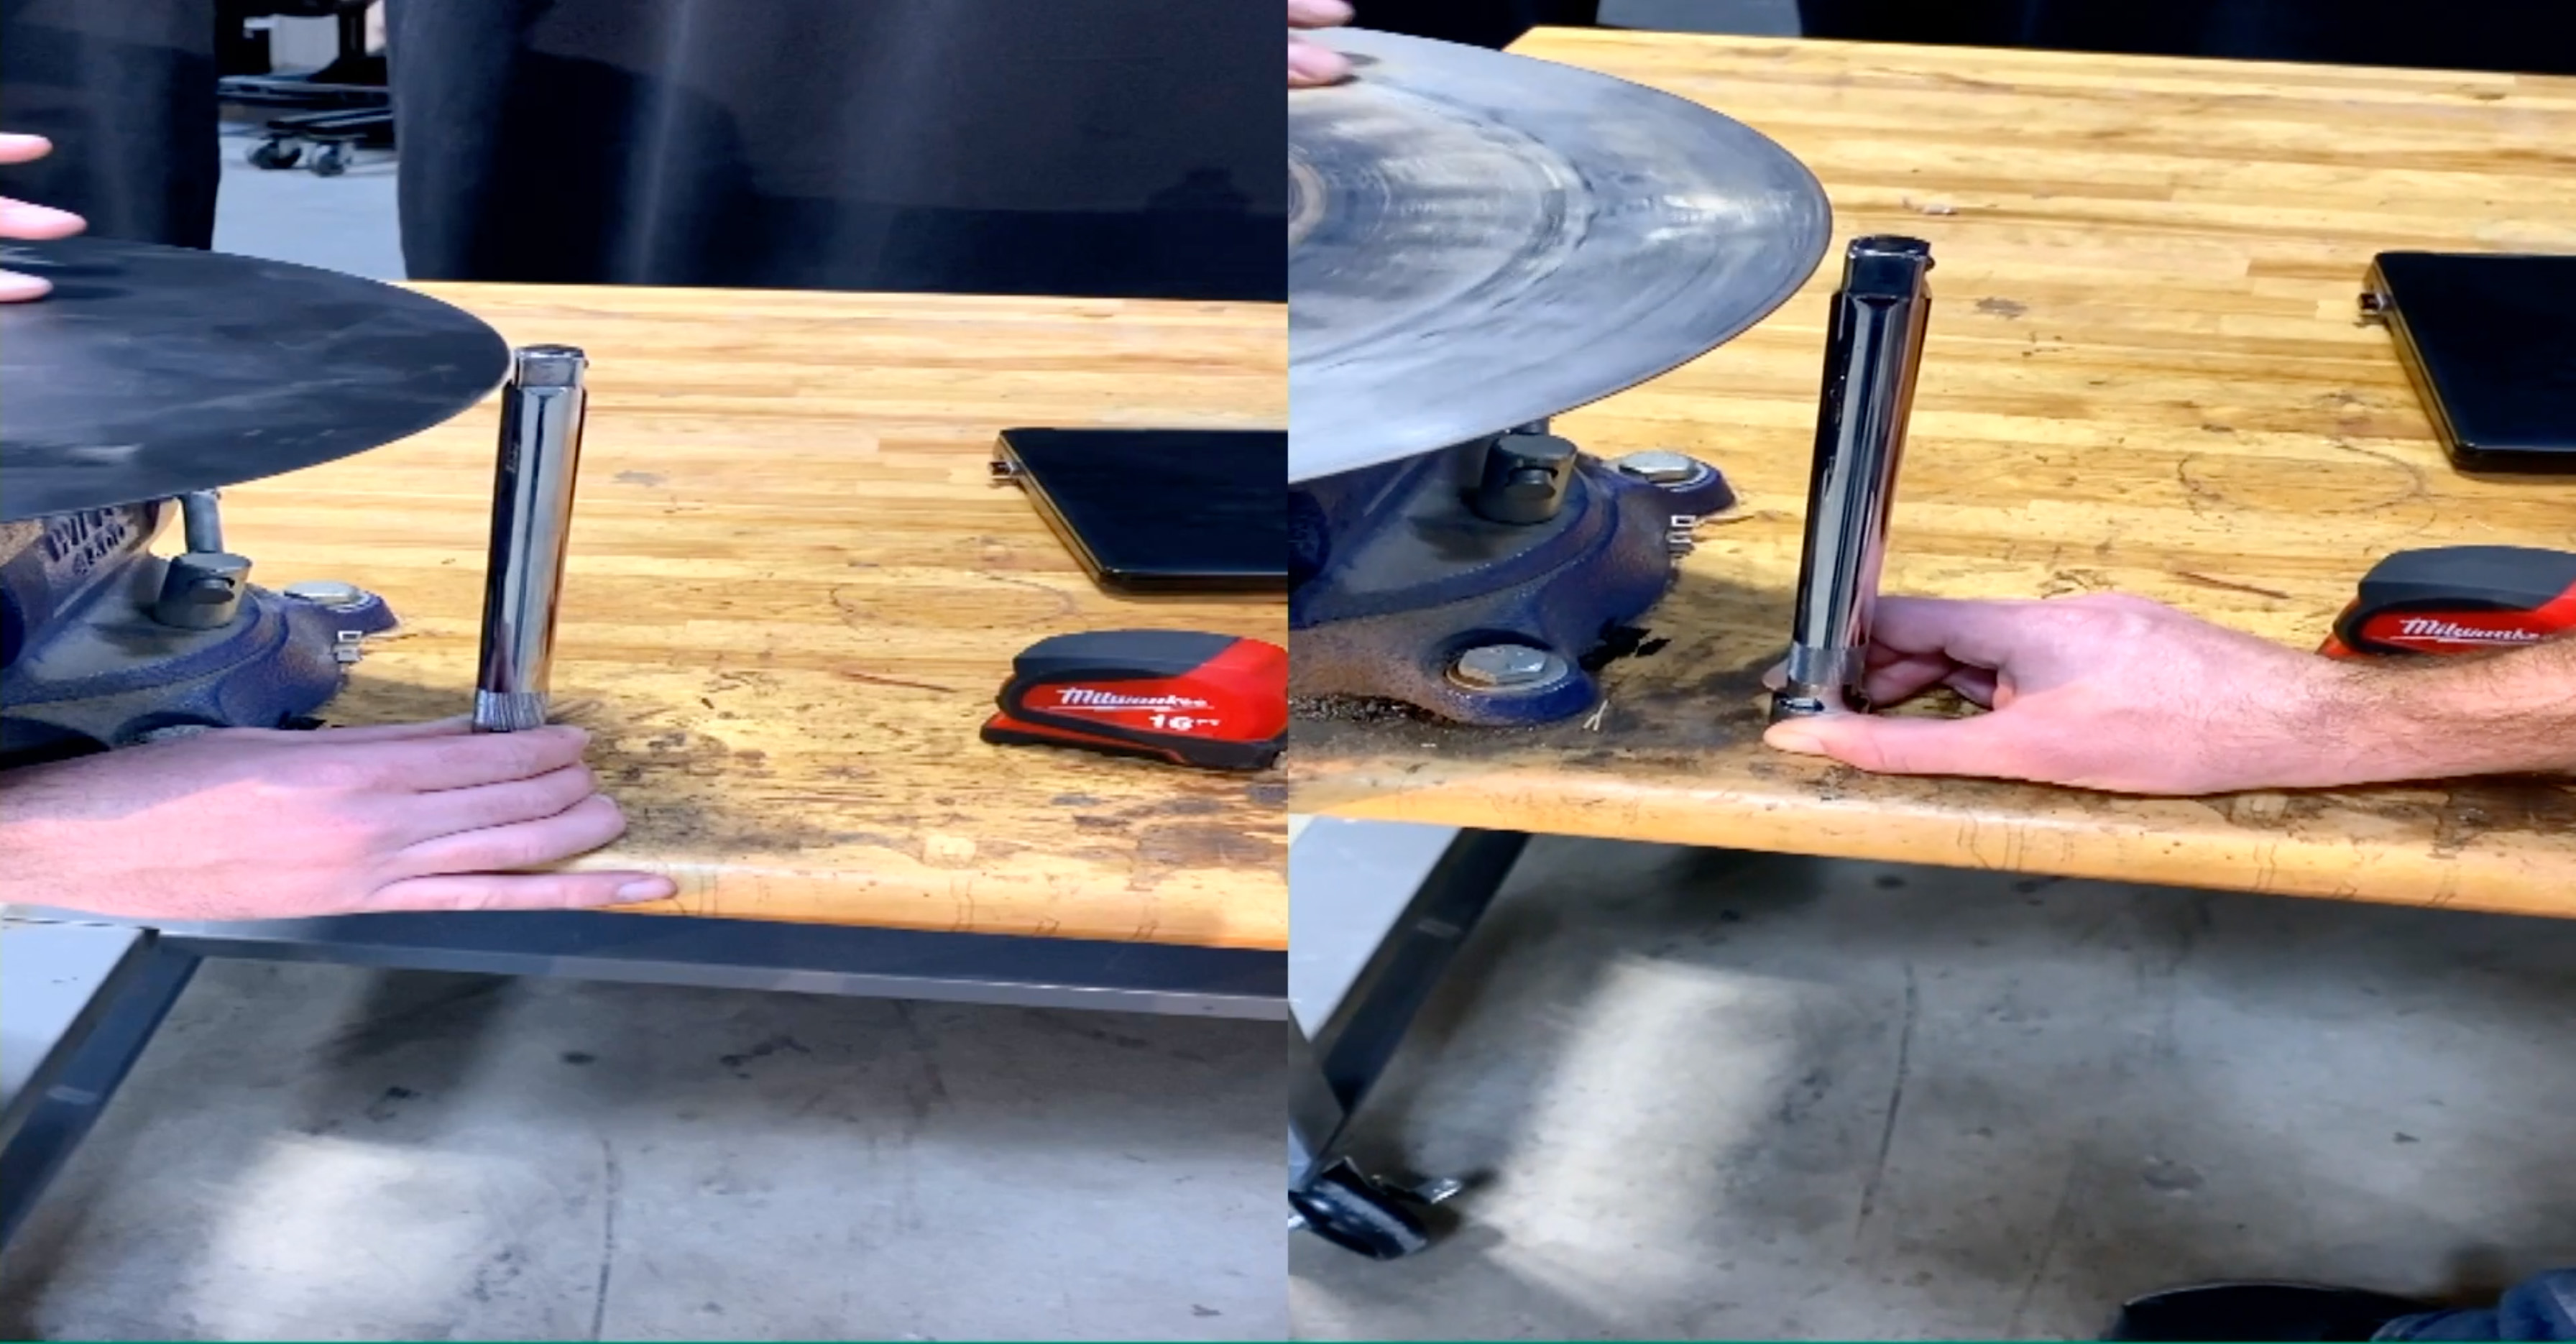
GIVE IT A SPIN. To check for uneven wear of an off-center hub, spin the disc over a stationary bolt or ratchet wrench extension. If the disc maintains a consistent distance from the reference point as it spins, it's in good shape. If not, uneven wear or an off-center hub may be at fault.
You’ll need to check and make sure that the hub is also centered on an opening disc on a used or on a new disc opener. You could also just measure from the center of the hub to the edge of your disc.
Why do we care about this? If you think about that disc turning going through the field, that's going to change your planting depth. We’re sure there are opening discs out there that have these issues, so make sure and check your disc openers before planting.
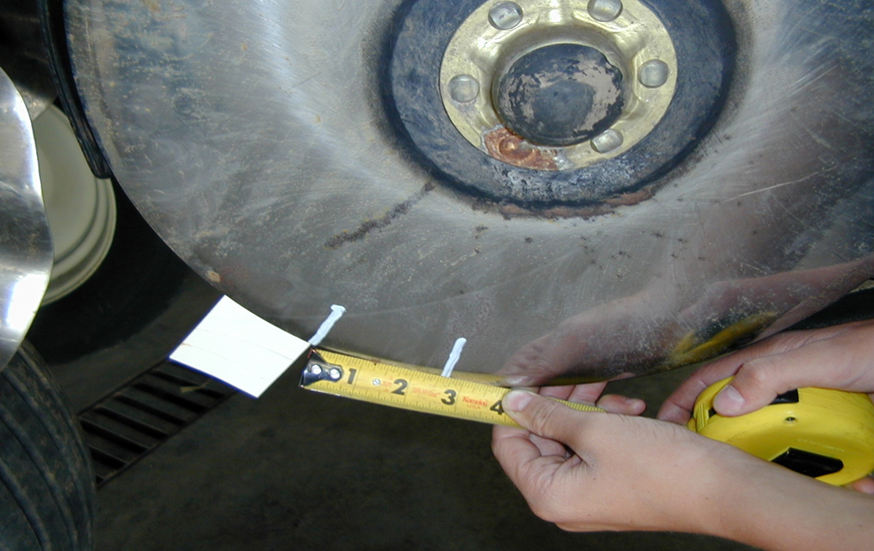
One last thing. Measure across the opening disc. We're using a John Deere row-unit for this example. Brand new, your disc should measure 15 inches. When it measures less than 14.5 inches, you want to replace that disc. If you keep using that disc, you're going to wear into some of the components between your openers. For Kinze replace if the diameter is less than 14.5 inches. For Case IH 12XX replace if the diameter is less than 13.5 inches. For Case IH 2XXX replace if the diameter is less than 14.5 inches. For White 9XXX replace if the diameter is less than 15.5 inches. And for White 8XXX replace if the diameter is less than 14 inches. Refer to your Original Equipment Manufacturer as to when it's time to replace your disc. While you've got the disc opener off, you're going to want to just measure across that disc and find out if it’s worn out.
REPLACEMENT TIME. Discs wear out over time, naturally, so even if all other metrics and measurements look good, they should be replaced when they wear down too much.
A Premier Precision Planting Dealer is your partner to help you achieve a picket fence stand this spring and steer clear of the regret that comes from avoidable yield loss caused by lack of maintenance. Find your local Precision Planting Premier Dealer at planterexpert.com.
Watch a video about disc opener maintenance. To see videos of all recommended annual maintenance checks, visit PrecisionPlanting.com/Maintenance.
Download the free Planter Maintenance Guide. This guide includes a 1-sheet checklist, links directing you to the corresponding videos, and an overview of 15 key maintenance areas on your planter.

The Planter Maintenance series is brought to you by Precision Planting.
For farmers who believe in better. Believing in better is a mindset to pursue excellence in everything you do. It’s welcoming opportunities to improve your farm and knowing that your best season is simply a starting point for this season. Precision Planting is for farmers like you who Believe in Better.