Spring strip-till can be both a choice and a necessity. While the benefits of fall-applied fertilizer and giving berms several months to settle ahead of planting are preferred by many strip-tillers, a properly-executed spring system can create an ideal seedbed.
Results of Strip-Till Farmer’s most recent annual benchmark study revealed that about 25% of respondents strip-tilled exclusively in the spring, and another 21% said they strip-till in both spring and fall. About two-thirds may refresh fall-built strips in spring.
So what is the secret to successful spring strip-till? We surveyed experienced spring strip-tillers and solicited advice from equipment manufacturers and academic researchers to get their top takeaways for a successful spring strip-till program.
- The time needed between stripping and planting can vary widely based on soil moisture and tilth. Sometimes it's better to plant within a day or two when it is damper and other times it is better to wait couple weeks. You just have to experiment and learn your soils.
- Ensure that after a spring strip-till pass, the planter is able to run smoothly on the freshly constructed berm. This berm must be higher than the soil out of the berm, but not more than 1 inch higher.
- Crop rotation can hold the key to the timing of a strip-till pass. With corn going into soybean stubble, there should be no significant differences between fall and spring strip-tilling. But with high-yielding continuous corn in the Corn Belt, consider strip-tilling in the spring, often as early as mid-March, especially in parts of the Midwest.
- Waiting until spring can allow for early spring manure applications and provides better residue flow through the planter. You can also apply a burndown herbicide at the same time.
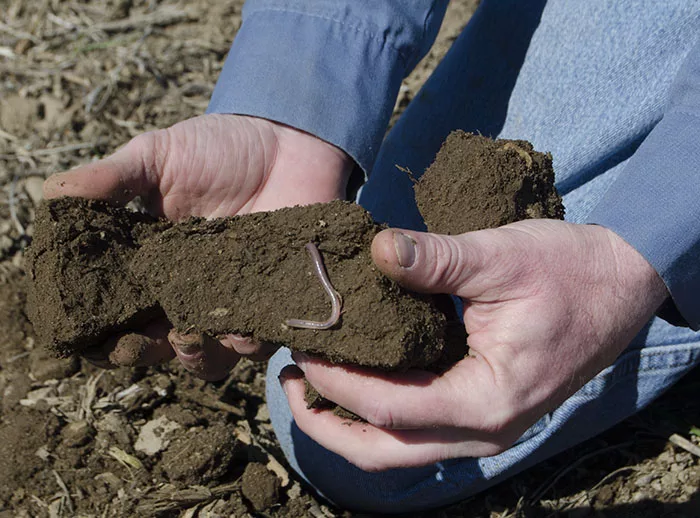
- Don't go when it's too wet. It can leave slots, air pockets and make clods unless your soils are structured well.
- Spring strip-till can encourage early plant vigor due to an increased temperature of the soil in the strip.
- Running shanks in spring can leave a void underneath the seedbed. Consider running the coulter-type units, that don’t build as tall of a berm. After a planter pass and a couple rains, you’re pretty well back to a flat field.
- Properly-planned spring strip-till can increase water infiltration rate by changing soil pore sizes.
- Consider using narrow gauge wheels when following with the planter. It helps row units maintain a more even depth because they fit the strip better.
- Residue management is a bit different after the trash has had a chance to decompose during winter. Taking notice of this may help farmers adjust their strategy and build better strips.
- Watch for soil voids, which will affect how smoothly the planter runs, seed depth and placement. Voids will also dry out the berm and you will not maximize existing moisture.
- Keep a close eye on the effect shanks are having on the soil. When you’re using a shank in the spring, make sure to use a less aggressive knife or point than you would in the fall. You still want some of that explosion, but not so much that the basket can’t come up afterward to take some of the air pockets out.
- Pay close attention to depth, depending on your location. Plan to run shallower than you would normally. If you leave a void from a strip-till shank that’s 7 inches deep and drop a seed in the bottom of that, it takes a long time to come up — it’s not pretty. Don’t jeopardize plant emergence by going too deep in spring.
- Soil temperatures at planting are 5 degrees warmer than with strips made in the fall. When we have fall stripped, the berms are fairly hard by spring, while spring-built strips are mellower and provide a much nicer seedbed.
- Spring strip-till can the enhance value of fall-seeded cover crops. Warmer, properly aerated soils in spring allow for banding fertilizer without losing costly fall-applied nitrogen (N). Thanks to the cover-crop nutrient bonus, it’s possible to reduce fertilizer needs by 40%.
- Consider strip-tilling in the same direction that you plant, as this keeps cornstalks from getting tied up in the planter.
- Have your equipment set for your conditions in the spring. That might mean operating depth, levelness of the toolbar or setting the attachment that you are running in the spring for the placement of fertilizer.
- Watch your fertilizer rates. It may be better to make a partial N application with the strip-till rig, then come back with the planter and sidedress the second half to spoon feed the crop and avoid getting it too hot right under the seed zone.
- Preplan your fertility program based on soil samples or mapping programs to ensure desired rates and formulas for optimal yield potential. Following the advice of an agronomist is another good way to dial-in spring application rates.
- Don’t get your N levels too high and don’t get your salty fertilizer levels too high in the zone. If you do have to apply those saltier fertilizers, make sure it’s banded at least 5 inches deep, and get it out of the seed zone to avoid the potential for seed burn and emergence issues.
- Placement may be especially challenging with fertilizers that are tricky to handle, such as urea. Be cautious with it. It’s a lighter product that can be harder to get mixed and placed properly.
- Consider a rolling basket in the spring. This will help to push the berm down, take the air pockets out and crumble the soil.
- Get to work early so there is enough time to plant, but heading out too early, especially in wet conditions, can cause problems. If you dig down and pull out a big mud ball, it’s probably too early. You want to see a little of the soil being able to crumble — that should be your go gauge.
- Timing is important when it comes to how closely the planter should follow the strip-till rig. With some of the clay soils, you won’t want too much time between strip-tilling and planting. You need to get back out there and get it planted quickly, because it can turn to bricks on you if it’s left for too long. Typically people are following the planter within a single day.
Expect some residue breakdown because you’re not going right after the combine and set your residue manager a little less aggressively than you might normally. This will prevent that residue manager from digging too much, and if you have a heavy rain you won’t end up with divots.
Transitioning from Fall to Spring Strip-Till

Hear more about moving to spring strip-till from Bloomington, Ill., strip-tiller Jason Lay. Seeking more flexibility and fertilizer efficiency, he shares the benefits and challenges. “We’ve decreased our nitrogen rates, while increasing yield and ultimately we want to increase profitability and spend less,” he says. “We’ve been able to do that a lot easier than with a fall anhydrous application program.”
You May Also Be Interested In...
Hitting the Sweet Spot with Strip-Till Fertilization Practices
Capitalize today on targeted fertilizer application techniques to benefit your strip-till operation. This 19-page in-depth eGuide includes practical, experience-based advice on the right timing, depth and rate to apply fertilizer and authoritative results. It’s a report you will turn to again and again as you take stock of where strip-till nutrient management stands today and where it needs to be in the future. Keep it handy as a primer for planning and meeting your cropping goals! Download now »