Switching from conventional tillage to strip-till is already a big adjustment without having to worry about fine-tuning the practice. But complacency breeds sub-standard results.
Mead, Neb., farmer Kerry Knuth, made the transition from dragging a disc ripper and mulch finisher across his 2,200-acre corn and soybeans operation to strip-tillage back in 2005. Though a “set it and forget it,” philosophy works on some farms, Knuth quickly determined that building an ideal berm required adaptation and experimentation to accommodate ever-changing field conditions.
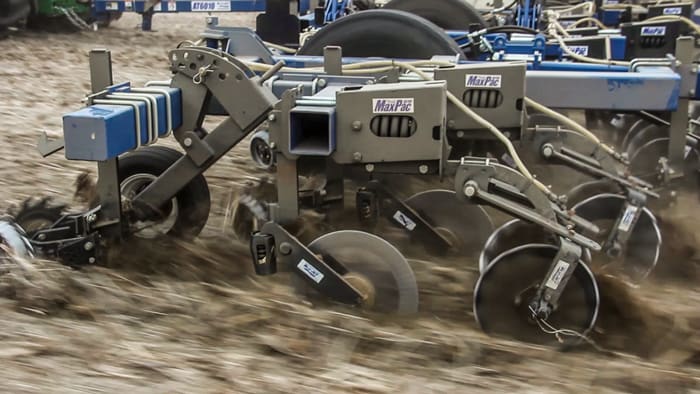
In 2009, he sought the assistance of Kimberley Ag Consulting out of Maxwell, Iowa. After purchasing a 24-row Blu-Jet AT6010 strip-till rig, he adopted a deeper strip-tilling style that focuses more on breaking compaction layers and “boiling the soil” in the strip to obtain maximum seed-to-soil contact.
Knuth offers a few field-tested strategies and equipment setting recommendations for achieving ideal results:
You May Also Be Interested In...
Innovative Opportunities to Increase Soil Biology In Strip-Till
If someone were to hand you a soil test report, would you be able to read the information and understand what it means? Unlock the hidden secrets of accurately deciphering your soil reports. Included in this FREE, 14-page special edition eGuide, readers will have the exciting opportunity to go step-by-step through fluently interpreting a soil test to make accurate decisions on your cropping operation. Download now »
1. Dig In
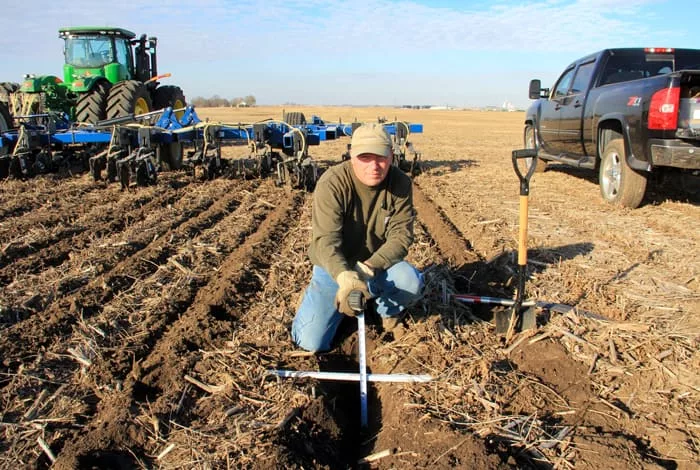
Much of Knuth’s strip-till strategy is predicated on the guess and check method. Though many wait for yield maps to check the effectiveness of certain adjustments, Knuth believes the best tool for this is still the trusty spade. By digging into strips right after building them, he can see how his strip-till rig is operating in real time.
“The best way to dig is take a spade and jam it into the soil as far as you can and leave it, then take another shovel and just dig it all back out,” says Knuth. “Then pull the spade out of there at a slight angle so you can see the profile. It’s so important to see what you’ve got going on in your strip.”
“The wrong knife can tear a hole beneath where it’s running so you lose seed-to-soil contact…” – Kerry Knuth
The main features Knuth is checking for are “sidewall fracture,” compaction and voids. If his implement is operating correctly, he’ll find no smearing or tearing, but boiled, loose soil instead.
“I don’t want an air pocket or hole beneath the strip because my roots will just travel right into that void and they’re not going to get any nutrients,” he says. “We’re looking to make sure that the soil is nice and tight all the way down because those are the planting conditions I want. I just can’t see that from the to — I have to dig.”
Digging isn’t just a pre-planting exercise either. Knuth believes in digging during the growing season and pre-harvest as well to monitor how his crops are interacting with the strips and any compaction layers.
“I have to take a look at the root structures in the strip,” he says. “The crown roots — my main root — should be able to go down as far as they want. Taking a look at them in the fall can show me a lot. It might take a long time and a lot of digging, but we can occasionally get down to four or five feet in a pit to examine the root structure.”
2. Go Row by Row
While adjusting strip-till settings, Knuth cautions that one size doesn’t fit all. The needs of each individual row should be examined instead of making uniform changes.
“We don't adjust rows all the same,” he says. “We go down each row and find out what depth we're working at. All our openers are at different heights across the whole bar, because we want them to do the correct job. And you need to level out the wing frames throughout the different seasons as well.”
3. Seek & Destroy Compaction
Previously, Knuth had been moving his corn strips over 15 inches every year. When he refocused his operation, it was suggested that he “deep rip” his acres to break up compaction layers and plant his corn in the same spot every year. But again, digging down made the process easier.
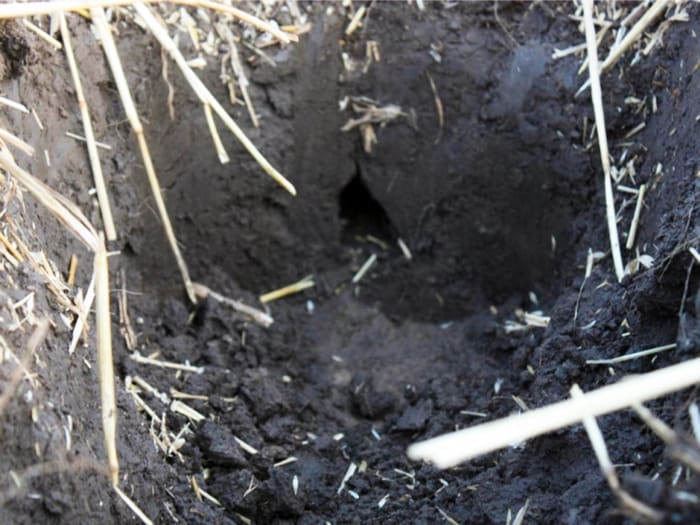
PAIN POCKET. Digging down into the strips themselves is the only way to examine the work a strip-till bar is doing in real time, says Knuth. Opening an air pocket beneath the seed bed can devastate growing conditions. If roots travel into this void, getting nutrients will be difficult. Photo courtesy of Kimberly Ag Consulting
“We were told to deep rip every acre, but there’s a lot of cost involved with that,” he says. “We dug pits with our back hoe and climbed inside to find our hard pan. We found that most of it was around 12 inches down, some at even 10 and 11 inches. We dug it up and checked the high and medium spots of the field, but most of the compaction was in the low areas where water sat.
“Those were the spots we went out and deep ripped. We went down 24 inches because that's where our hard pan was. We got those loosened up and then from there on we could just the hard pan taken out of the rest of the acres where it was 10 to 12 inches deep just by strip-tilling.”
4. Play with Knives
When it comes to knives and shanks, Knuth likes a buffet of options. Field conditions change all the time, so adjust you row units accordingly, he says.
“With strip-till, having those knives set correctly is my number one priority before planting…” – Kerry Knuth
“When building strips, we’ll test several knives at the same time on different sides of the machine to see which ones are best,” says Knuth. “There are mole knives, thin knives, tall knives, but we tend to have better luck with the tall ones. The wrong knife can tear a hole beneath where it’s running so you lose seed-to-soil contact. But if you test them out and dig, you can see how each one is working.”
In one instance, Knuth learned the value of having the proper knife size, to avoid leaving a void in the berm. Running a regular mole knife, he didn’t like the results in the field and cut them down to 1-inch widths. He then beveled the point, but was still having issues so further trimmed the knives down to three-quarter inch widths.
RIDE ALONG. Knuth feels the only way to ensure coulters and knives are running at the proper depth is to watch them in action. He’ll often attach cameras to the bar, or have someone else drive the tractor while he rides alongside the strip-tiller to examine each row unit. Photo courtesy of Kimberly Ag Consulting
“It seems like a lot of work but with strip-till, having those knives set correctly is my number one priority before planting,” Knuth says. “If I don't strip-till correctly, my planter is not going to work correctly.”
Less obvious is the knife’s pitch. This occasionally means more customization than some are willing to make, but the results can be dramatic, says Knuth.
“The pitch can make a huge difference,” he says. “If you have a knife out at too much of a pitch — like 9-inches — you may be just boiling way too much of the soil in the wrong conditions and you won’t get the strip closed up and have a nice berm. What we sometimes have to do is make our own slot with our own iron worker. Then we can tip it back so the pitch is around 4 inches. That can end up making a world of difference.”
5. Swap Coulters
Like knives, Knuth believes in a healthy selection of coulters, especially as conditions vary across seasons. Though he tries to get most of his strip-tilling done in the fall, time constraints often have him building, or rebuilding, strips in the spring. Knuth says he watches closely what’s happening within the first few inches of soil to make sure he has the right coulters running.
Size vs. Speed: 48-Row
Planter Efficiencies
Hear more from Mead, Neb., strip-tiller Kerry Knuth discussing the advantages and considerations of utilizing a 48-row planter on his strip-till operation, shot on location at his farm by Strip-Till Farmer editors.
“We often end up using wavy coulters in the fall and prefer thinner coulters with a thinner knife in the spring,” he says. “We don’t want to disturb too much of the soil if we have to build strips in the spring. The thinner coulters with small ripples are usually much better for that.”
Knuth also added Yetter Mfg. openers with his coulters, built his own bracket and attached them to the front of the row units to help manage residue.
“We like to clean our trash before the coulter even gets there because otherwise we can pin trash with a coulter,” he says. “There is more and more trash these days, so it's very important to get that cleaned away and allow for a nice, clean berm.”
6. Sink the Knife & Coulter
Knuth feels that the coulter should be running at the same depth as the knife, once the optimum depth is determined. However, what it’s set at isn’t always how it runs, he says.
“If you're in the cab and you can't see, you have to get out and actually watch it run,” Knuth says. “We occasionally take cameras to watch it, or I’ll have one of my sons drive and I’ll ride alongside the bar to watch what each row is doing.”
If something is askew, it might call for some customization.
“Not everything is always manufactured perfectly,” says Knuth. “There might be a tweak needed like adding a shim to get something to proper depth. We’ve had to add an eight-inch piece of angle iron to bring a knife back down at least two inches, but it made a total difference. We need consistent depth.”