By Joe Breker, as interviewed by Martha Mintz
My first introduction to no-till came through a 1970s soils class at North Dakota State Univ. The instructor didn’t know much about it —nobody did at the time — but he challenged the class to learn more. I took that challenge to heart. I found growers in northeastern North Dakota and southern Manitoba who were actively no-tilling and toured their farms. I found it interesting and figured it was something I could bring home to our farm.
True to form, my father embraced the idea. We started no-tilling in the 1980s and haven’t looked back. Instead, I continue to drive forward pushing to see how I can take conservation farming practices to the next level.
Nearly 20 years ago I was featured in another No-Till Farmer (Strip-Till Farmer’s sister publication) article. The change my farming strategies have undergone in the subsequent two decades are a testament to my dedication to make this work. Plus, working a challenge makes farming more fun and interesting.
On Dry Ground
Cold, wet soil was my biggest challenge back in 2006. Even after 20 years of no-till and soil structure building, conditions at planting were often frustrating at best. I switched to bigger tires and even tracks on equipment. I started strip-tilling to deal with the mat of moisture when planting corn into wheat stubble. When possible, residue was left standing to prevent making a mat.
I’m happy to report that tremendous progress has been made in that department. At the time of the 2006 article, I was just starting to tile some of my ground and was dabbling in cover crops. Both have since proven essential to creating a system that works on multiple levels.
Saline seeps are a significant problem in this area. We live along an elevation change and have mineral-laden water. It soaks down from the upper elevations and exits where we are farming. The result is areas of fields that don’t produce. Those areas, which also usually have heavy clay soil, are where we focused tiling efforts.
“Cold, wet soil was my biggest challenge. I started strip-tilling to deal with the mat of moisture when planting corn into wheat stubble…”
Tiling really saved my no-till program. The cold, wet soils with the weather patterns we were having were really putting a strain on no-till. Once I tiled some of those troubled acres, I had much better luck with water management. I also started to experiment with cover crops.
The combination of cover crops and tiling helped remediate the saline areas. They went from not growing anything to being some of the most productive areas on the farm. That’s in part because they went for years receiving fertility but not producing any crop. Tiling helped move the water, and cover crop mixes got the soils functioning again.
It did take some trial and error, though. Initially I was growing cover crops that were good forages, as we had livestock at the time. It turns out that cover crops that are good forages aren’t necessarily species that are adapted to poorly drained, high salt, high pH, poor soils.
When I started adding brassicas and more cereals to the mix, I started seeing progress in the saline areas and the soil was slowly remediated.
Warming Up
Success with cover crops pushed me in the direction of more plants, less tillage. This led me to experiment further with ways to get more roots in the ground.
I want a variety of roots and for there to be living roots for as much of the year as possible. The challenge, of course, is getting plants established and working with your crop rotation.
The easy place to incorporate cover crops in my system was to seed them in July after winter wheat harvest. There was always some volunteer wheat, but it wasn’t consistent and it wasn’t diverse.
I found if I planted a diverse mix by August, they would grow enough forage for grazing later in the year and would help soak up moisture in spring. As opposed to the bright, reflective wheat stubble, the cover crop produced a dark, light-absorbing residue that helped warm the fields the next spring, allowing me to plant into those acres earlier than before.
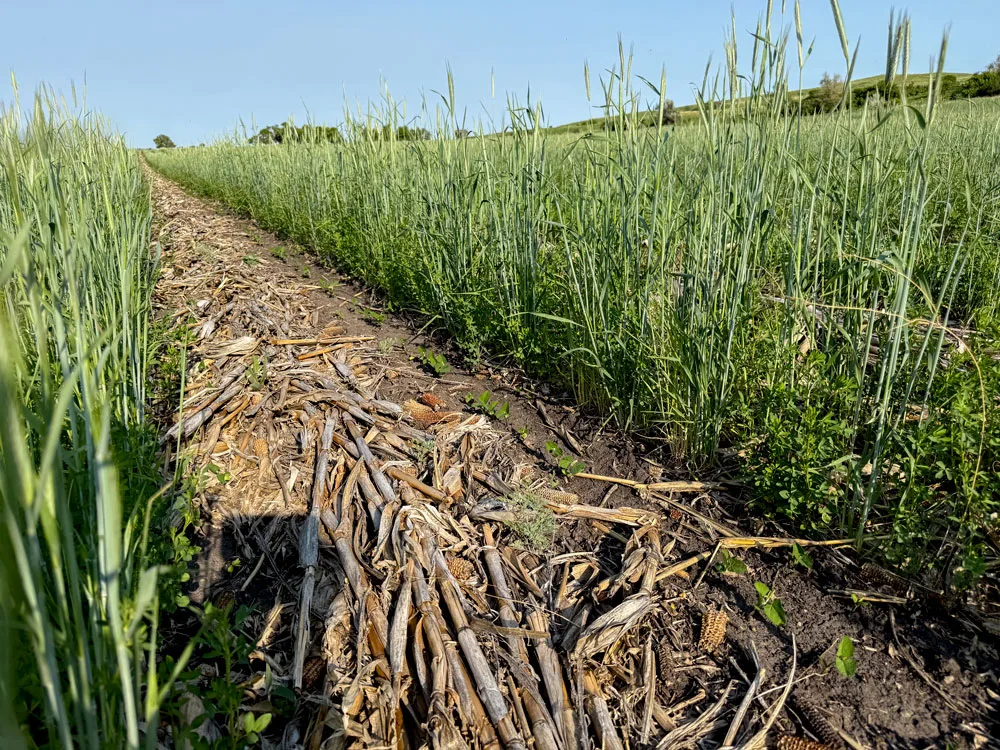
BIO STRIP-TILL. Fava beans are used to grow bio strips to seed corn into the following year. The legumes provide nitrogen for the plant, but also create a dark, heat absorbing strip that increases soil temperature by as much as 10F degrees at corn planting. Joe Breker
This is a proof of concept that led to bio strip-tilling. The Conservation Cropping Systems Project (CCSP) research farm at Foreman, N.D., that I work with had seen consistent yield bumps with strip-tilling in heavy residue.
I was intrigued, but our goal was to reduce tillage. The manager came up with planting covers in rows in the fall that you would plant directly into in the spring. I’ve been bio strip-tilling for 10 years now and it’s a pretty good practice if you can manage it.
Just like traditional tillage or strip-till, there’s a window of opportunity you have to hit. Fava bean has proven to be an excellent bio-till crop ahead of corn. I will plant strips of fava beans into cereal stubble. Ideally, the fava beans will grow 12-18 inches tall before a killing frost.
The beautiful thing about fava beans is when they die, they turn a dark chocolate brown, and the leaves fall off and lay at the base of the plant. The dark color actually results in higher soil temperature the next spring, just like traditional strip-till.
It can change the soil temperature at corn planting by 10 degrees. It also provides additional nitrogen (N) rich biomass that breaks down very quickly and is readily available to the corn plant.
More Light, More Roots
As I pushed toward the goal of living roots in the soil 365 days per year, I kept bumping into the problem of light. It was difficult to establish cover crops under the canopy of a standing corn crop. I spent 10 years broadcasting cover crops aerially into corn with mixed results.
I tried interplanting into 30-inch rows early in the season. I would get a good stand established, then when August and September rolled around, the corn canopy would fill in and it would get dark.
Sometimes the cover crop would survive, but they were delicate. If we got a little dry spell, we’d lose the cover crop. It was the same with aerial applications. If you didn’t get a well-timed rain, or maybe birds or insects got to the seed, you wouldn’t get a crop.
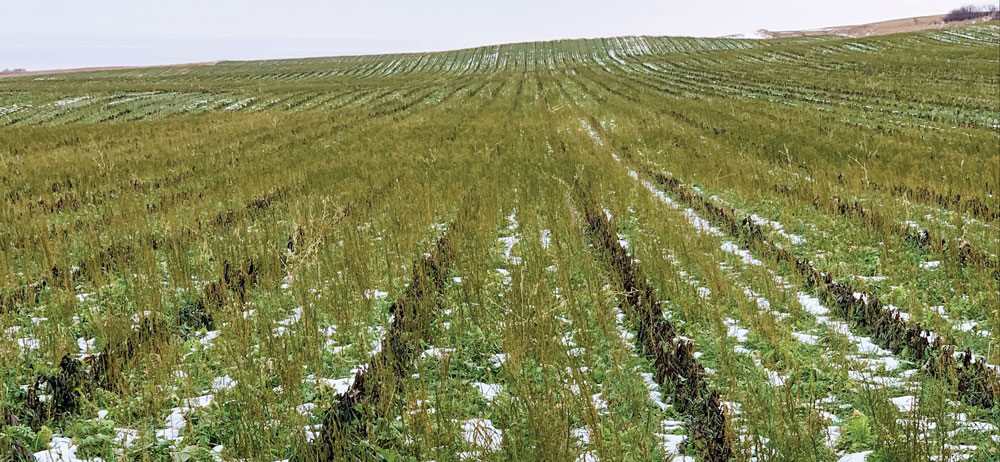
I started looking into the concept of wide-row corn to support my desire to establish cover crops, and it worked. In 10 years of using the practice I haven’t had a single cover crop failure in wide-row corn. That includes overwintering into spring.
With other methods I couldn’t count on planting into a green cover because I never knew if I would have a stand. Now I can count on an established mix of cereal rye, alfalfa, flax, oats, camelina, and other crops. Some will survive the winter and help manage moisture in the spring. I plant soybeans into the growing cover and it’s proven to be a great rotation for me.
To plant 60-inch corn I built a custom planter. I have a 20-foot, 2-rank planter frame, set up with Precision Planting row units, that is 3-point mounted on a Case IH Magnum tractor. This is a small rig. I only do around 700-800 acres of corn due to the size.
“The easy place to incorporate cover crops in my system was to seed them in July after winter wheat harvest…”
The planter plants 2 rows of corn 6 inches apart and leaves a 54-inch space between the next pair of rows. I seed a population of 32,000 seeds per acre, just like I would in a traditional 30-inch-row crop.
I sidedress N and seed the cover crop in 1 pass using a box drill with the openers situated so the run just between the corn rows. I have 6 disc openers spaced 7 inches apart. Four of them seed cover crops while the two closest to the corn rows are plumbed for liquid fertilizer to sidedress the corn.
Splitting the fertilizer application is also advantageous. With a split application I’m able to evaluate the corn stand, know the moisture situation, and I can soil test to determine what available N there is near the paired row. I’m able to make applications based on that information.
These practices, along with others — such as applied compost — have allowed me to maintain a ratio of 0.4 pounds of applied N per bushel of yield goal. I apply at most 80 pounds of N with a 225- to 240-bushel yield goal.
After seeding, the cover crops have access to sun all season long. So does the corn. The wide row creates a solar corridor that benefits all plants.
Normally, bottom leaves start to senesce from the bottom up late in the season when corn is filling. This is due to lack of sunlight. In the wide-row system the leaves stay green bottom to top until full maturity.
I think this is part of the reason you can do wider row spacing and still have normal yields. In fact, this year I had the highest corn yields across the farm I’ve ever had and it was all wide-spaced corn.